![oxfordrisk.zendesk.comhctheming_assets01HZPK08F39VSQFMWBN7WG19VM.png]](https://help-centre.oxfordrisk.com/hs-fs/hubfs/social-suggested-images/oxfordrisk.zendesk.comhctheming_assets01HZPK08F39VSQFMWBN7WG19VM.png?height=40&name=oxfordrisk.zendesk.comhctheming_assets01HZPK08F39VSQFMWBN7WG19VM.png)
This guide covers every part of the Adviser Portal that advisers and assistants can use, following the redesign of the site.
- Advisers can create clients, send questionnaires, review results and approve reports.
- Assistants can only see clients assigned to the advisers they are linked to. An assistant must be linked to at least one adviser before they can create clients.
The portal has three main areas:
- Clients page: your home page, listing all your clients.
- Client pages: a client's results, reports and comments.
- Account menu: your settings, help and log out.
The Clients page
When you log in, you land on the Clients page. You can return to it at any time by clicking the Oxford Risk logo in the top-left corner, or Clients in the breadcrumb trail.
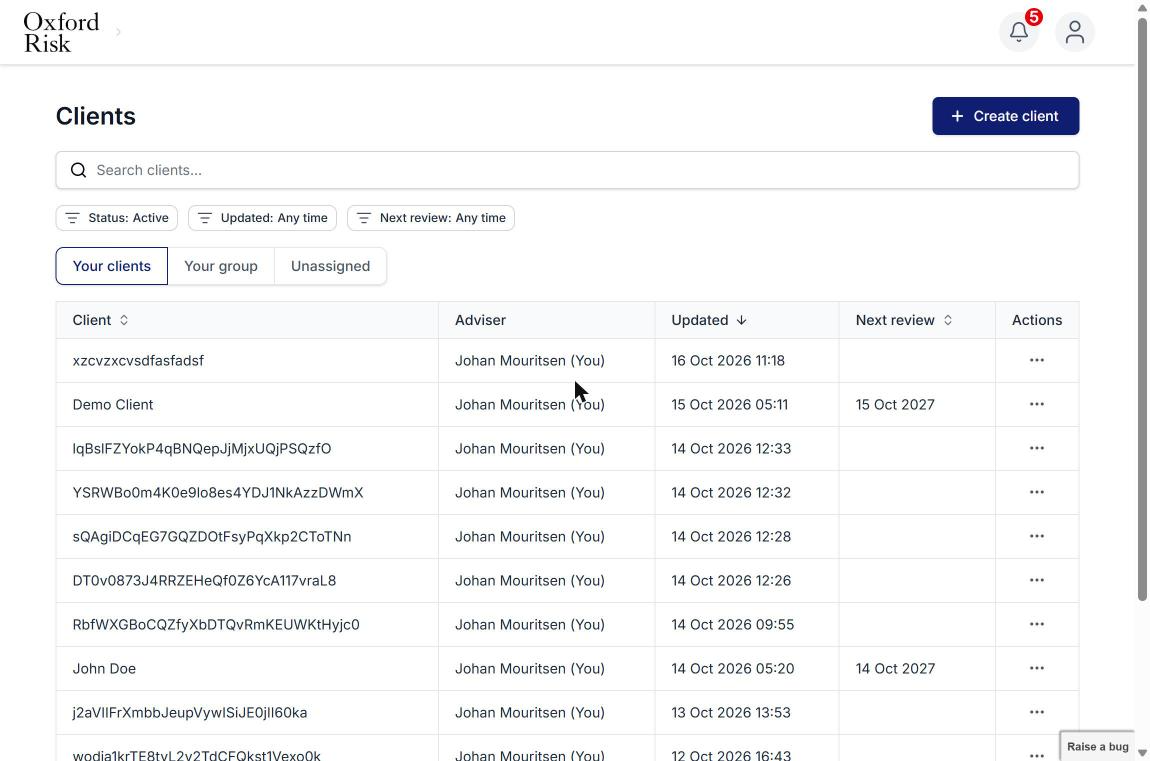
Finding a client
- Search clients: type a client's name in the search bar.
- Filters: narrow the list using the three filters under the search bar:
- Status: Active or Archived.
- Updated: Any time, Past 7 days, Past 30 days, Past year, or More than 1 year ago.
- Next review: Any time, Due for review, Next 7 days, Next 30 days, Next year, or More than 1 year away.
- Tabs: switch between Your clients, Your group and Unassigned.
- Sorting: click the Client, Updated or Next review column headings to sort the table.
Use the arrows at the bottom of the table to move between pages, and the number box to change how many clients are shown per page.
Client table and actions
Each row shows the client's name, their Adviser, when they were last Updated and their Next review date.
- Click a client's name to open their client pages (see Client pages and reports below).
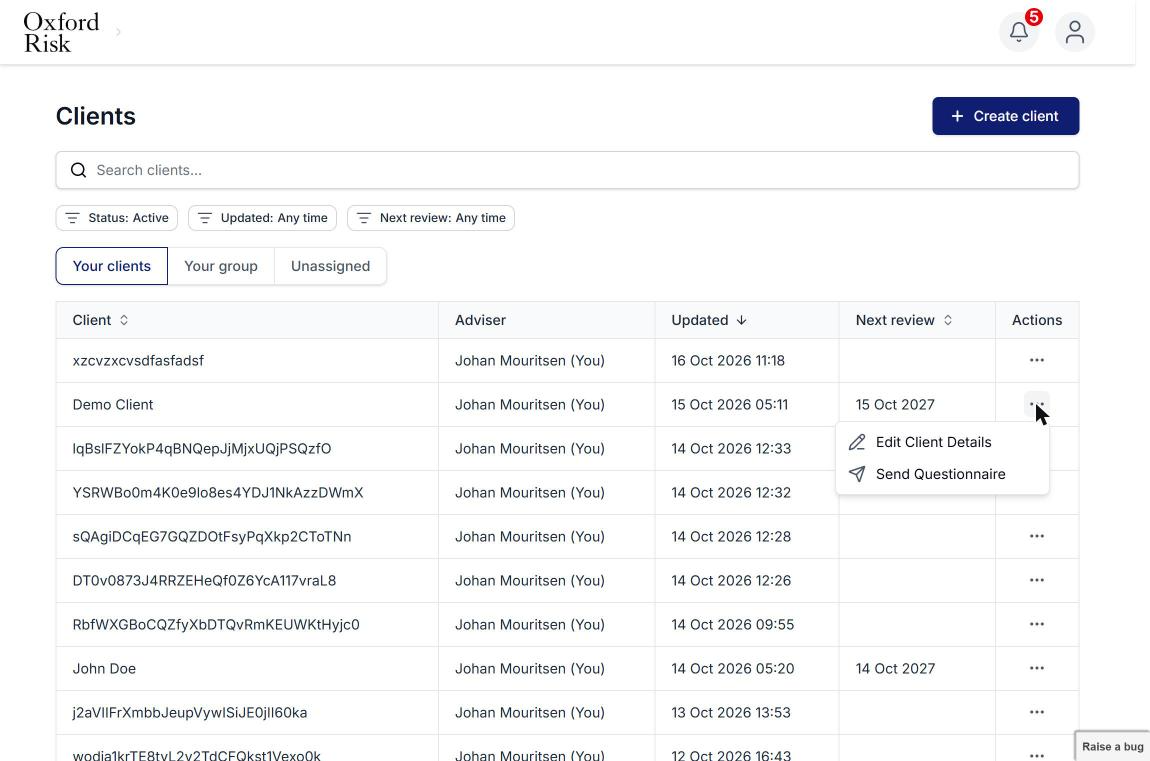
- Click the ⋯ button in the Actions column for quick actions:
- Edit Client Details: update the client's personal details.
- Send Questionnaire: send the client a questionnaire link (see Sending a questionnaire below).
Notifications
Recent client activity now appears in the Notifications panel, which replaces the activity log on the old Dashboard. Click the bell icon in the top-right corner to open it. The red badge shows how many notifications you have.
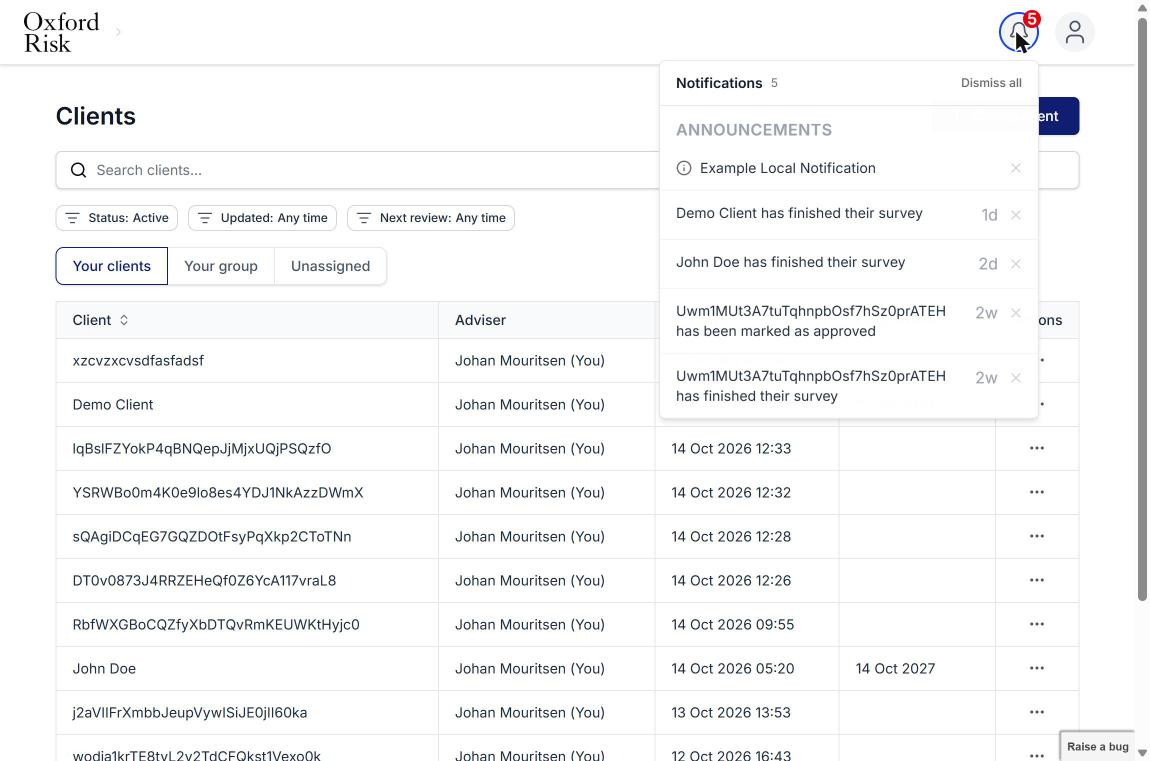
The panel shows:
- Announcements from Oxford Risk.
- Client activity, such as when a client has finished their survey or a report has been marked as approved, with how long ago it happened.
Click the × next to a notification to dismiss it, or click Dismiss all to clear the panel.
Your account
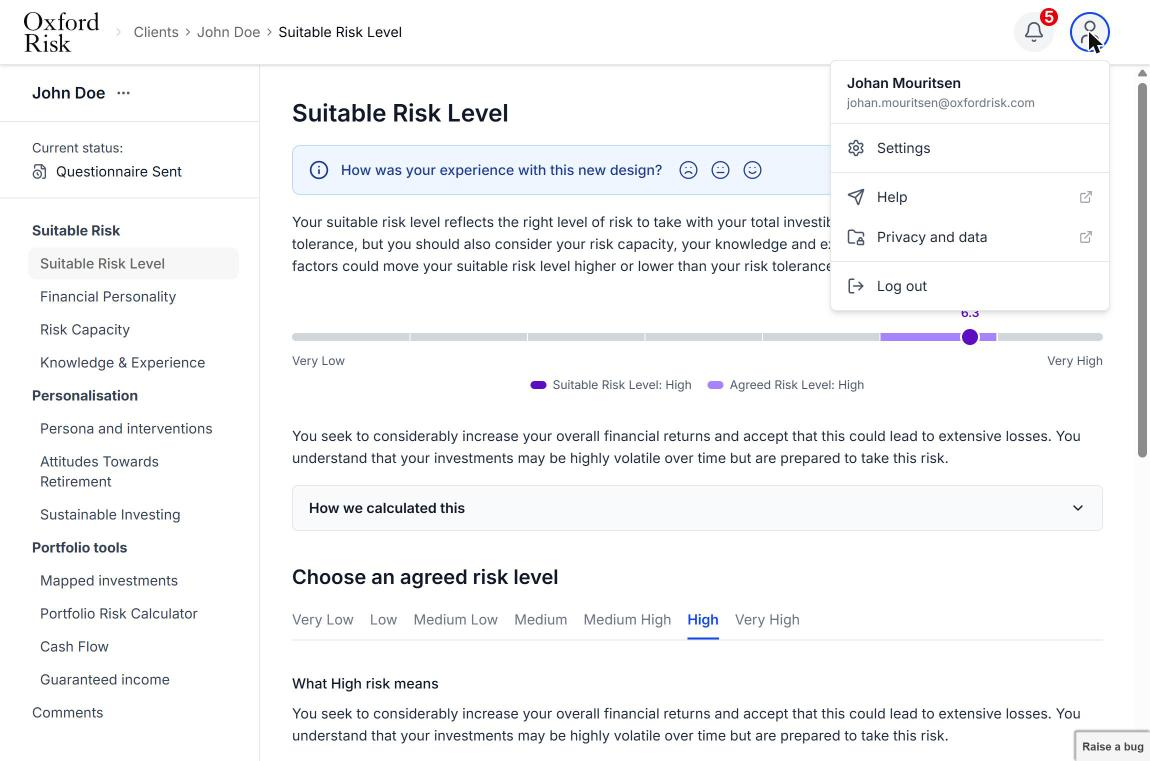
Click the person icon in the top-right corner to open the account menu. It shows your name and email address, and these options:
- Settings: your details, password and email notifications.
- Help: opens the Oxford Risk Help Centre in a new tab.
- Privacy and data: opens the Investor Compass privacy notice in a new tab.
- Log out.
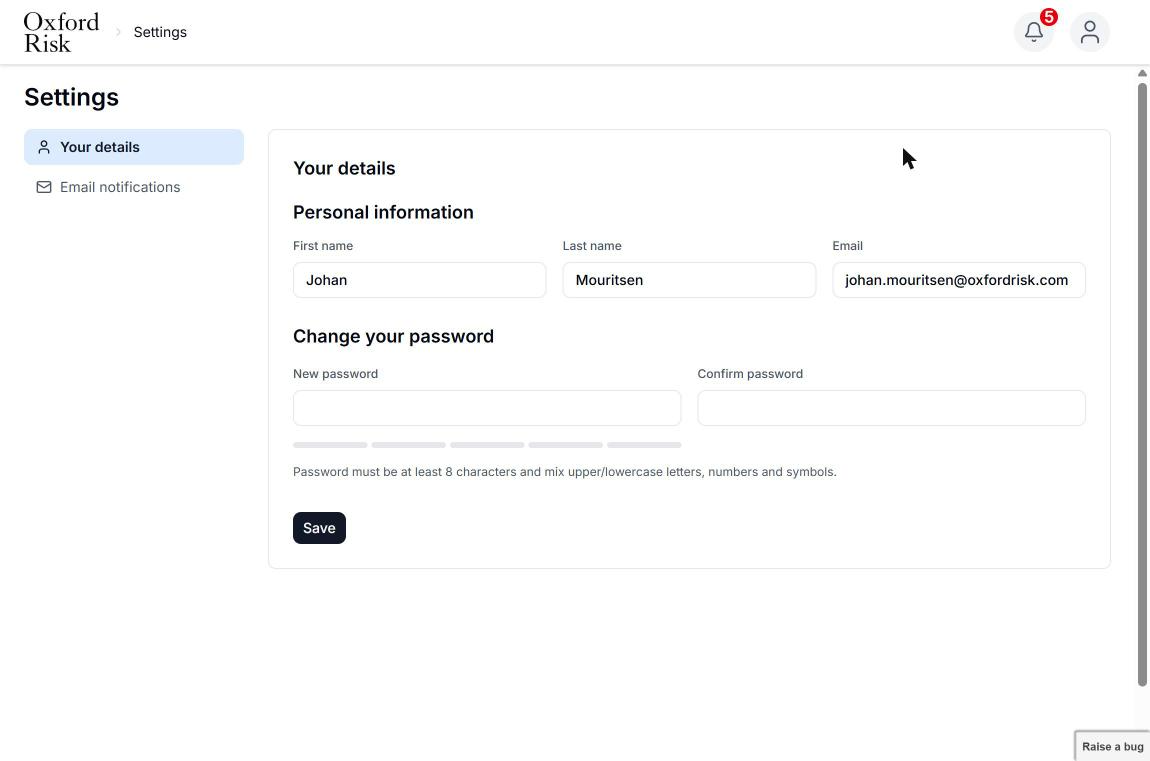
Settings: Your details
- Personal information: your first name, last name and email address.
- Change your password: enter your new password twice, then click Save. Passwords must be at least 8 characters and mix upper and lowercase letters, numbers and symbols.
Settings: Email notifications
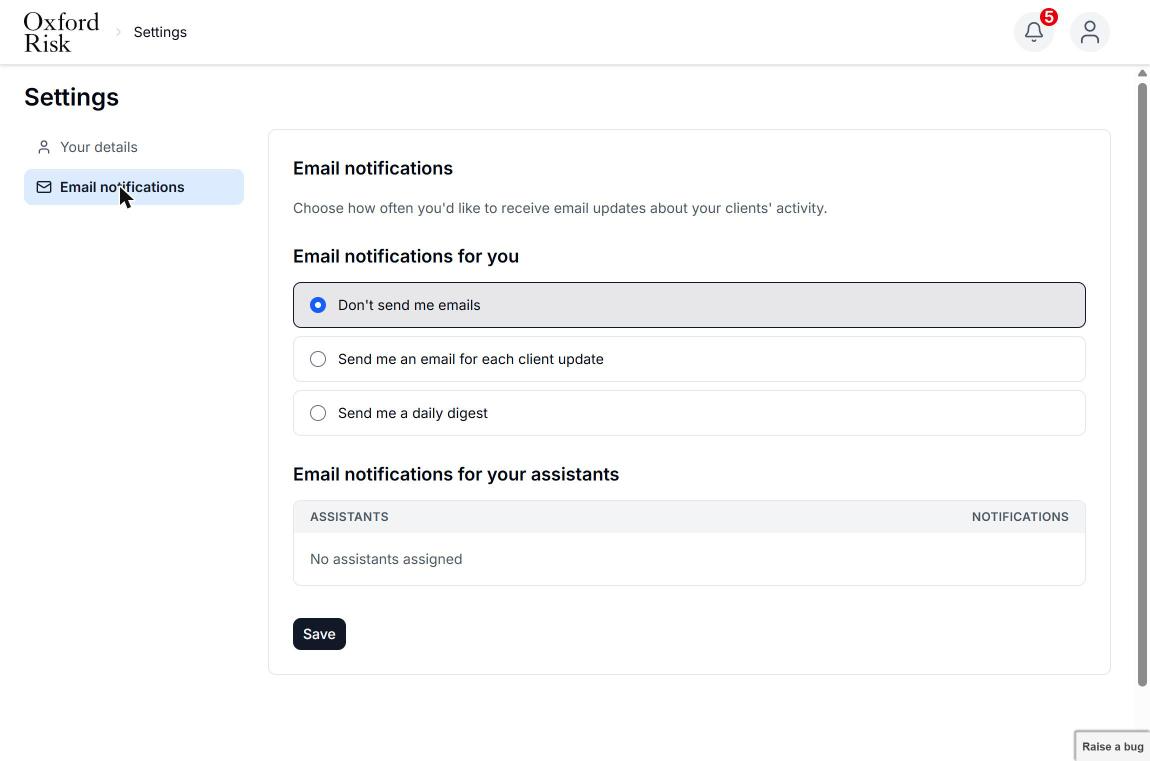
Choose how often you receive emails about your clients' activity, then click Save:
- Don't send me emails
- Send me an email for each client update
- Send me a daily digest
Your personal setting overrides your company's default setting.
Advisers can also turn notifications on or off for each of their assistants under Email notifications for your assistants.
To contact Oxford Risk Support, email support@oxfordrisk.com or use Help in the account menu.
Creating a client
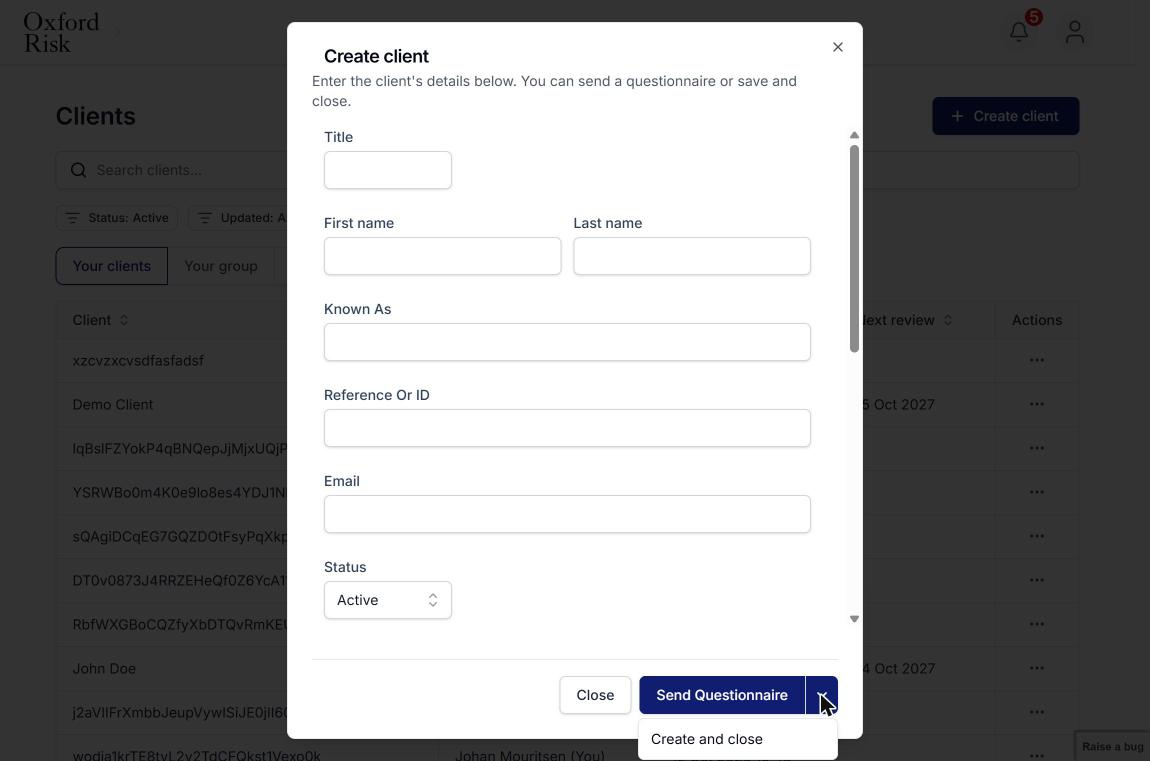
- On the Clients page, click + Create client.
- Enter the client's details:
- Title, First name, Last name, Known As and Middle Names
- Reference Or ID
- Email: needed if you want to email the questionnaire link to the client.
- Status: Active or Archived.
- Assign To: the adviser the client belongs to.
- Country of Residence and Date of birth
- Any custom fields your firm has set up.
- Choose how to finish:
- Click Send Questionnaire to create the client and send them a questionnaire.
- Click the arrow next to Send Questionnaire and select Create and close to save the client without sending anything.
Sending a questionnaire
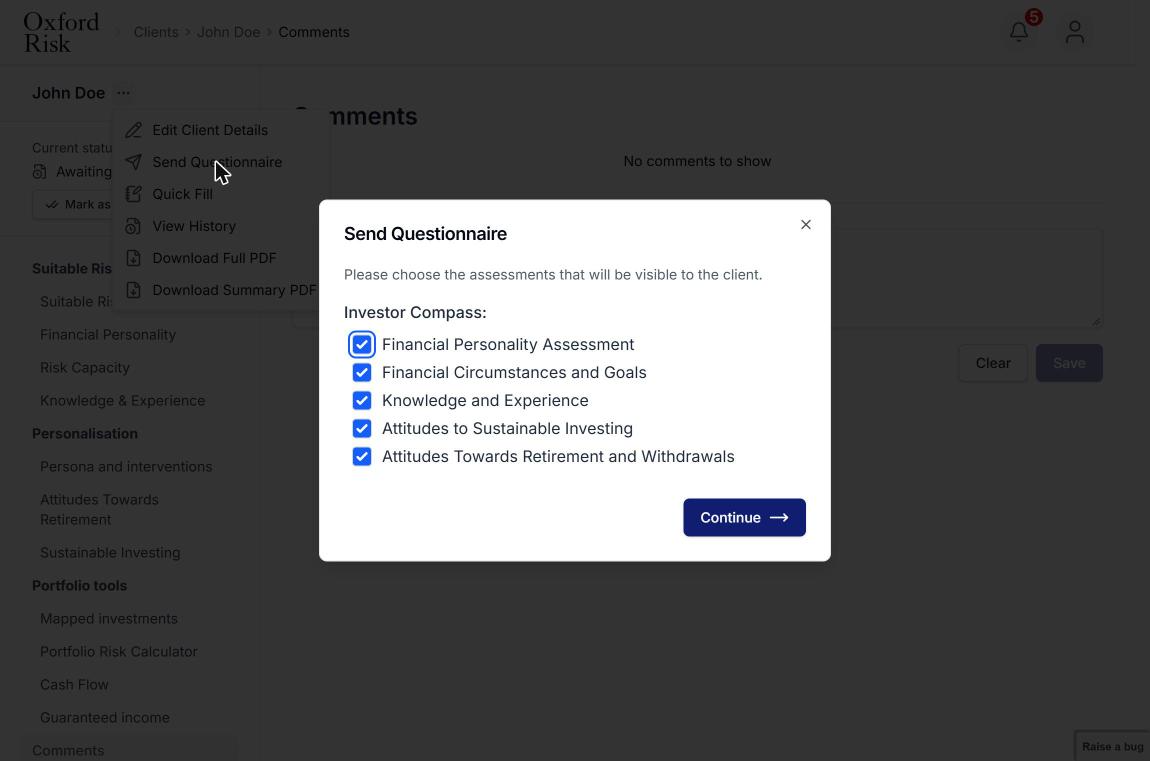
You can send a questionnaire when you create a client, or later from the ⋯ menu on the Clients page or on the client's pages.
- Tick the assessments the client should see:
- Financial Personality Assessment
- Financial Circumstances and Goals
- Knowledge and Experience
- Attitudes to Sustainable Investing
- Attitudes Towards Retirement and Withdrawals
- Click Continue.
- Choose how to send the questionnaire:
- Copy link: copy the link and share it with the client yourself.
- Send email: email the link to the client. This is only available if the client has an email address saved.
- Quick Fill: complete the questionnaire now, for example during a meeting with the client.
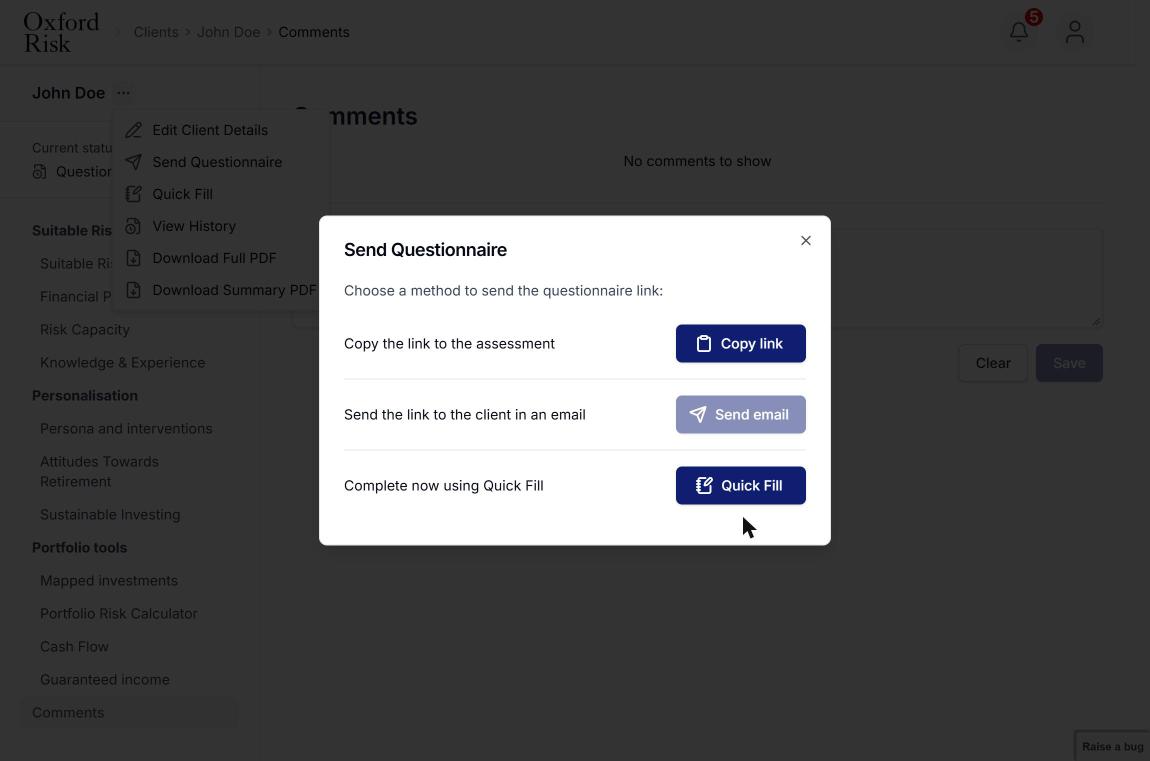
Note: The client's status changes to Questionnaire Sent as soon as you click Continue, even if you close the window without sending the link.
Client pages and reports
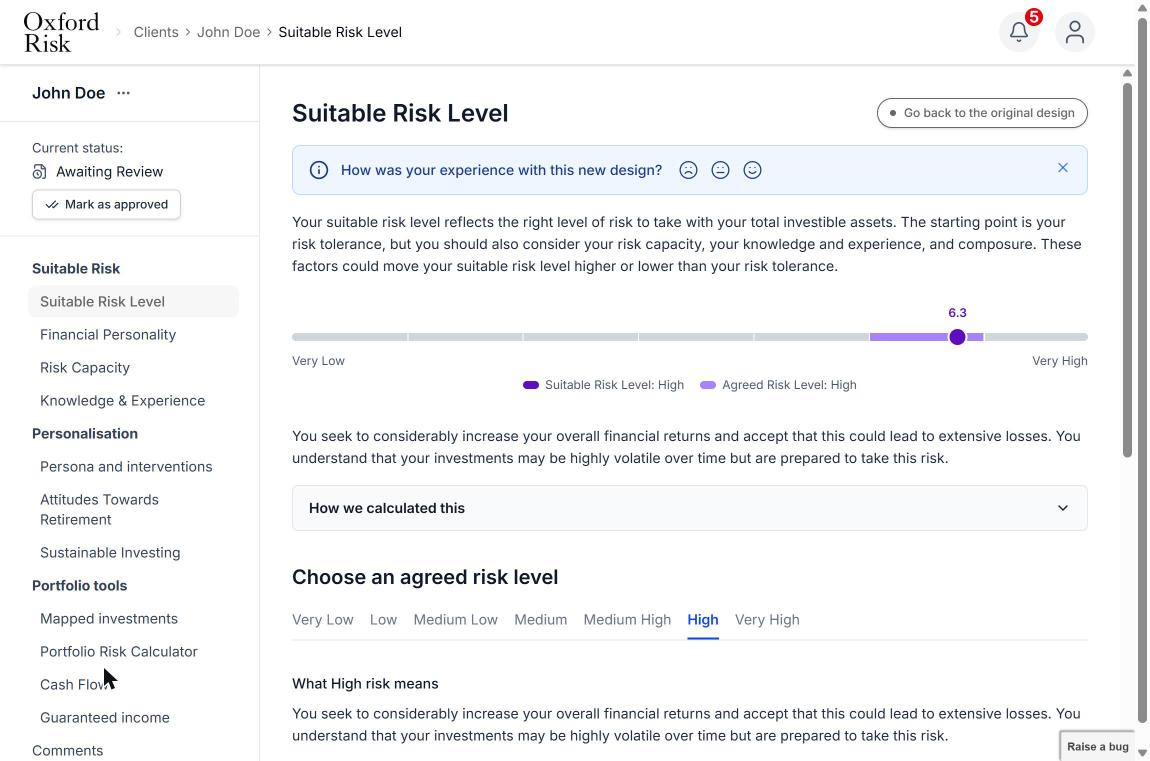
Click a client's name on the Clients page to open their pages. The on-screen report opens on the Suitable Risk Level page.
Navigating a client's pages
The panel on the left shows the client's name, their Current status (for example, Questionnaire Sent or Awaiting Review) and the report sections:
- Suitable Risk: Suitable Risk Level, Financial Personality, Risk Capacity, Knowledge & Experience.
- Personalisation: Persona and interventions, Attitudes Towards Retirement, Sustainable Investing.
- Portfolio tools: Mapped investments, Portfolio Risk Calculator, Cash Flow, Guaranteed income.
- Comments: notes about the client.
If the client has not yet completed a section, that page says so.
For a full explanation of each section, see the Investor Compass User Guide.
Choosing an agreed risk level
On the Suitable Risk Level page, the scale shows the client's Suitable Risk Level and Agreed Risk Level. Click How we calculated this to see how the result was reached.
To set the agreed risk level:
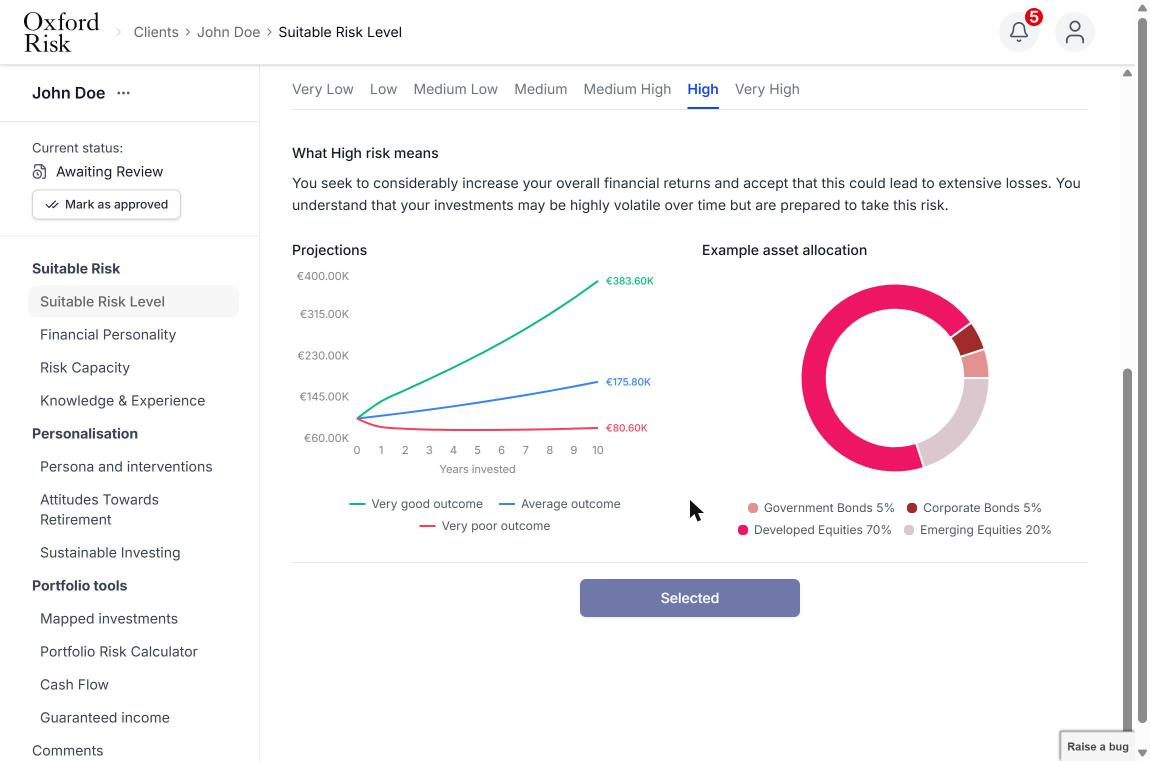
- Under Choose an agreed risk level, click a level from Very Low to Very High.
- Review what the level means, the Projections chart and the Example asset allocation.
- Click Select. The button shows Selected for the current agreed level.
Client options menu
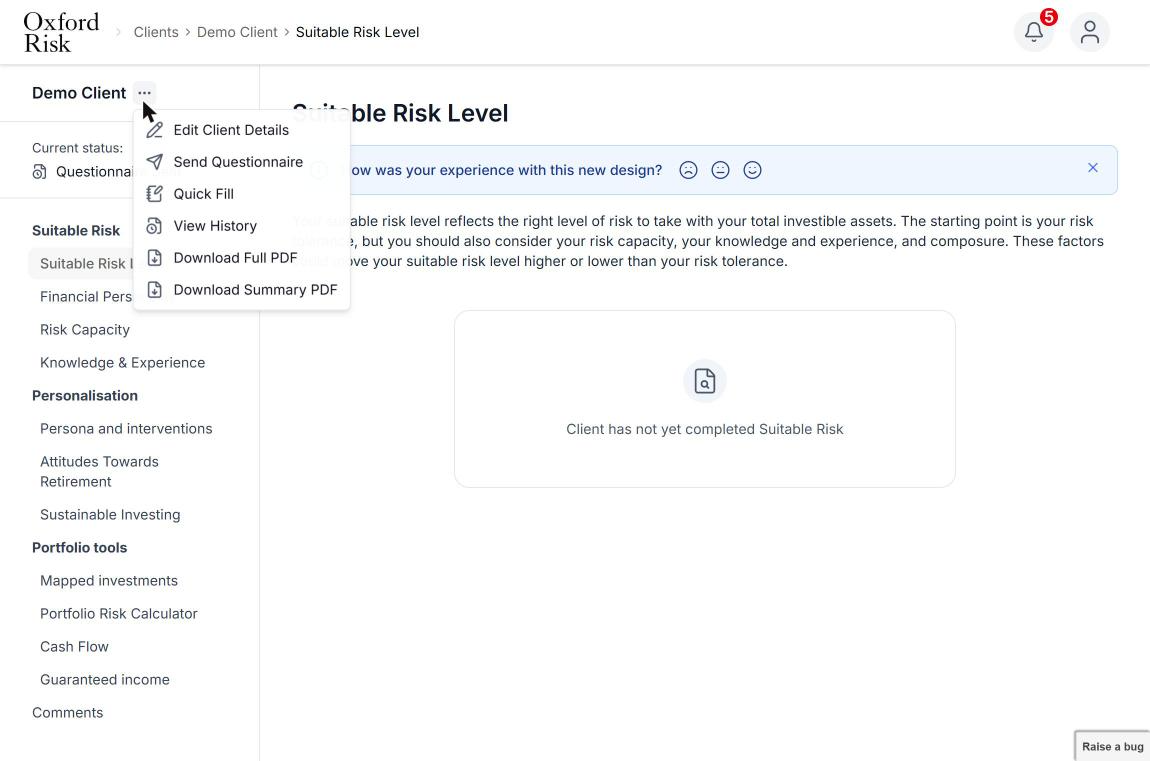
Click the ⋯ next to the client's name for these options:
- Edit Client Details
- Send Questionnaire
- Quick Fill: complete or update the client's answers yourself.
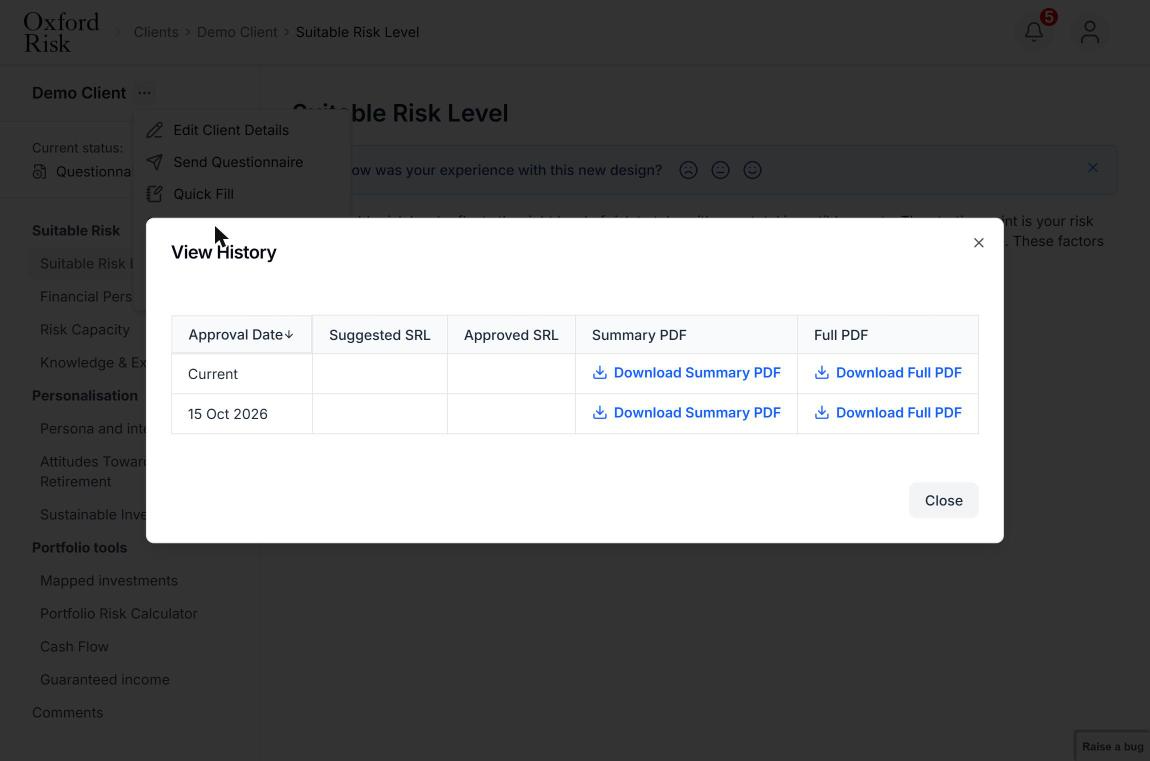
- View History: see previous approved versions.
- Download Full PDF
- Download Summary PDF
Report types
|
Report |
What it contains |
Where to find it |
|---|---|---|
|
On-screen report |
The client's full results, section by section |
Click the client's name on the Clients page |
|
Full PDF |
The same content as the on-screen report |
⋯ menu > Download Full PDF |
|
Summary PDF |
The report without the projections chart and comments |
⋯ menu > Download Summary PDF |
View History
View History lists each approved version of the client's report, with its approval date, Suggested SRL and Approved SRL. You can download the Summary PDF or Full PDF for the current version or any earlier one.
Comments
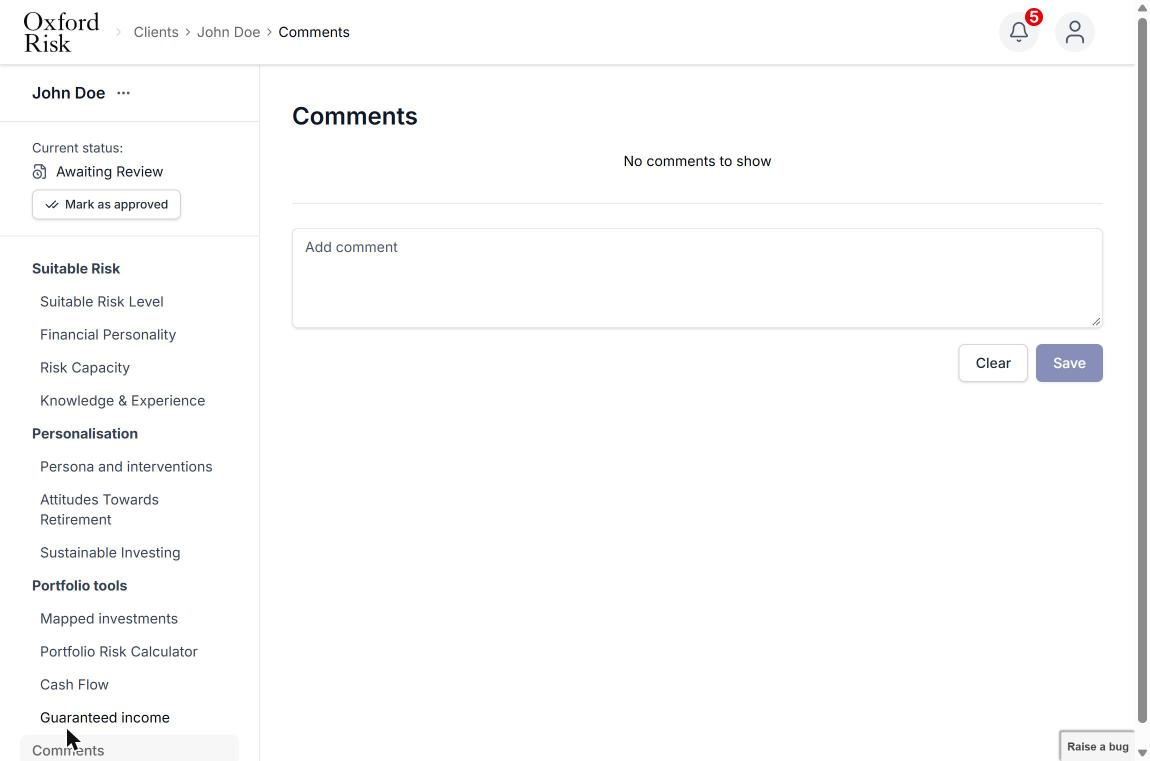
Open Comments in the left panel, type your note in Add comment and click Save. Click Clear to remove text you haven't saved.
Approving a report
When a client's status is Awaiting Review, a Mark as approved button appears under their status.
Important: Once a report is marked as approved, the response can't be edited. This can't be undone.