![oxfordrisk.zendesk.comhctheming_assets01HZPK08F39VSQFMWBN7WG19VM.png]](https://help-centre.oxfordrisk.com/hs-fs/hubfs/social-suggested-images/oxfordrisk.zendesk.comhctheming_assets01HZPK08F39VSQFMWBN7WG19VM.png?height=40&name=oxfordrisk.zendesk.comhctheming_assets01HZPK08F39VSQFMWBN7WG19VM.png)
In this article you will find multiple information and actions that you can take with your clients information.
This article will cover:
- Creating a client
- Adding a custom client data field
- Disable or hide client fields
- Start a profile ▶️
- Sending a client one part of the questionnaire at a time
- Clients list
- Viewing a client's page
- Client status
- Editing client's details
- Client's history
- Archive clients
- Deleting clients
- Reactivate clients
Creating a client
1. The landing page shows your list of clients. 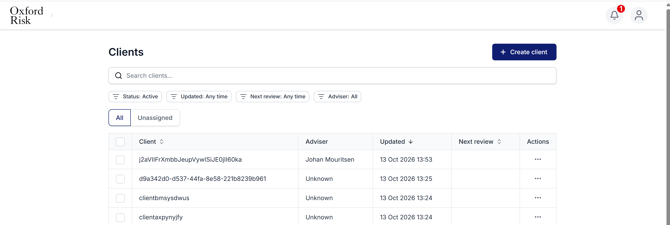
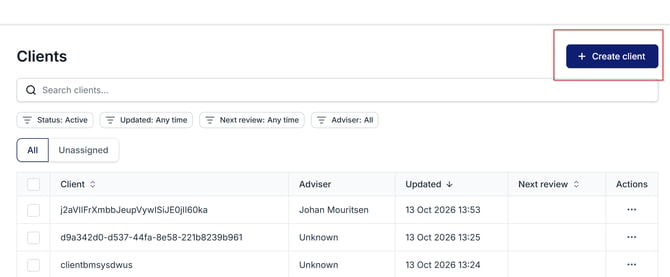
2. Press ‘create client’.
3. Add details to the clients profile and, when complete, click 'Send Questionnaire' or 'Create and close'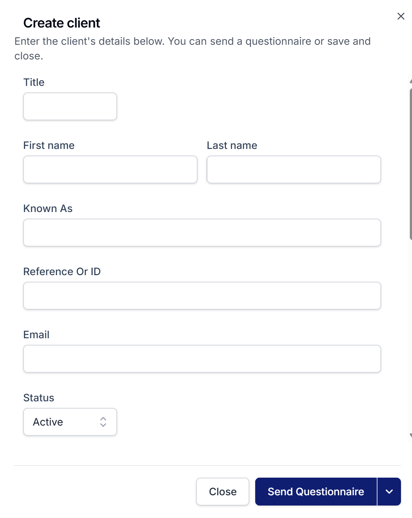
4. Title is a free text field, though Mr/Mrs/Ms/Dr are presented in a drop-down menu for convenience.
5. Gender is a free text field, though Male/Female/Prefer not to say are presented in a drop-down menu for convenience.
7. The Known As field will default to the title plus the last name, but this can be overwritten with any text.
8. If you do not specify ‘reference or ID’, a random ID will be used by our system to identify this client. Some companies do not show this field to users.
9. Advisers and assistants are only able to assign to other advisers in their group. For some users, this will mean they can only assign clients to one user.
10. You must specify an email address if you want to send invitations via email.
Adding a custom client data field
This section is intended for company admins. If you are an adviser or an assistant user, you might be looking for the section about creating a client at the beginning of this article or the editing client details section found further down below.
Your users can enter data about your clients into the Oxford Risk system, such as their name, email address, date of birth and more. This information can be used to make the system feel more personal – such as by addressing clients by name in email invitations – and can make it easier for your users to find the client they need.
As a company admin, you can add additional fields for your users, such as an internal reference or account number field. Users will then be able to search for clients using this custom field.
- From any page, click on the icon in the top right corner
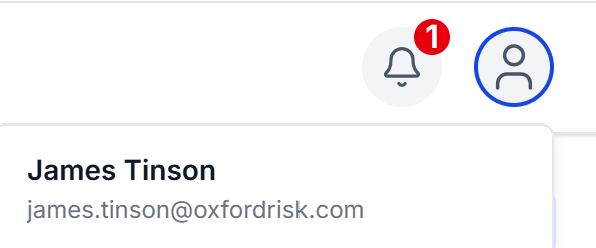
- Choose 'settings' to go to the settings page, then 'Security & Privacy'
- Under 'Client Data Fields' you will see all of the data fields already available. Here, you can Choose which client information is captured and what clients can edit by toggling each field on or off.
- At the bottom of the list is an option to 'Add new field'
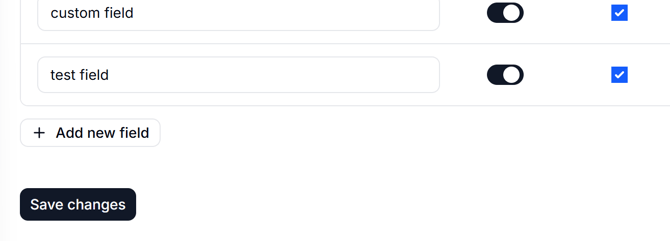
- Enter a name for your new field
- Decide whether clients should be able to edit this field. The field will automatically be an editable field, but untick the box if you don't want the client to be able to edit it.
- Be sure to save your changes by clicking 'Save changes' at the bottom of the page
Disable or hide client fields
This section is intended for company admins. If you are an adviser or an assistant user, you might be looking for the section about creating a client located at the beginning of this article or the editing client details section located further within this article
Your users can enter data about your clients into the Oxford Risk system, such as their name, email address, date of birth, and more. This information can be used to make the system feel more personal – such as by addressing clients by name in email invitations – and can make it easier for your users to find the client they need.
However, you may wish to limit users to only providing specific information, or even no client information at all. To limit what client information users can provide, you will need to adjust your company's client field settings.
- From any page, click on the icon in the top right corner
- Choose 'settings' to go to the settings page, then 'Security & Privacy'
- Under 'Client Data Fields' you will see all of the data fields already available. Here, you can Choose which client information is captured and what clients can edit by toggling each field on or off.
- To hide a field from everyone, press the toggle in the "active" column to deactivate the field.
- Deactivating one of our standard fields (e.g. last name) hides that field from users, but does not remove any data that users may have entered in the past. To delete previously entered client data, you will need to edit the relevant clients.
- Deactivating a custom client field hides that field from users, then gives you the option of deleting all data associated with that field. Deleting the data is irreversible, so think carefully before proceeding!
- Be sure to save your changes by clicking 'Save changes' at the bottom of the page
Start a profile
Sending a client one part of the questionnaire at a time
If you have a client who only needs to do one part of the questionnaire, you can send them just that part and optionally complete the other parts later. For example, you may be looking to:
- Only update a client's risk tolerance, and not their knowledge and experience;
- Send a client the financial personality assessment, but complete the financial circumstances yourself from existing records; or
- Send a client one part today, then another part after a call or meeting.
To send part of the questionnaire, start a profile as you normally do. When selecting what to send to the client, simply untick the box next to each part you don't want to send. In other words, only the ticked parts will get sent to the client.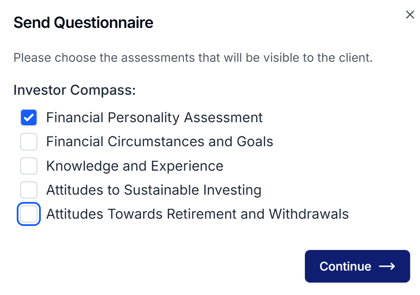
To send other parts of the questionnaire (or to complete them yourself using quick fill), find the client response on the responses table, then click to open the actions menu. Select "pick what to send", then add one or more outstanding parts of the questionnaire (previously sent parts will be greyed out).
As your client completes each part, the results will be added to the client page and reports.
Important: make sure you add additional parts using the "pick what to send" feature, and not by creating a new profile for the client, because otherwise you will have multiple parts that won't be combined into a single report.
Clients list
1. Your list of clients is now shown on your Landing/Clients page
2. Search for a client using the search field.
3. Filter the list of clients by opening the filters menu and selecting one or more filters. Press ‘reset filters’ to reset the table.
4. Change the number of clients displayed per page.
5. Toggle between clients assigned to you (not available to all users), assigned to your group (not available to all users), and unassigned clients.
6. Change the sorting rule for the table by clicking a column header.
Viewing a client's page
1. Click on the client's name to view that clients page.
2. Review the client’s latest results, across all instruments.
3. Use the menu on the left of the page to navigate between each sections
Client status
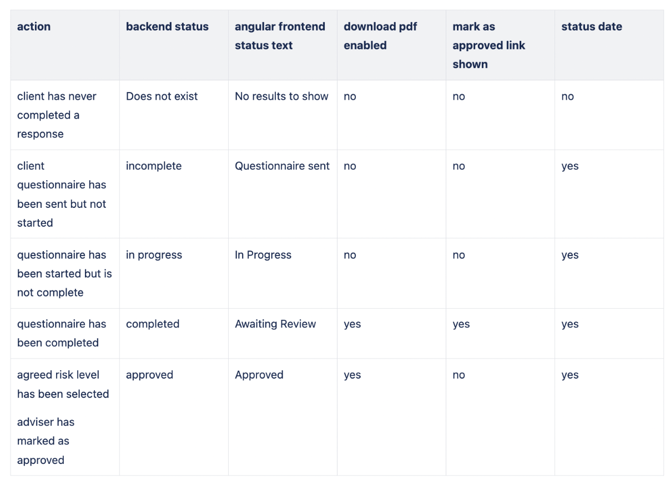
Only adviser users have the permission to mark a client as APPROVED. The APPROVED status is irreversible and the client's response will not be editable on this status.
Editing client's details
1. On the Clients page, in the Actions column, click on the 3 dots and select Edit Client Details
2. Edit the client details.
3.Once you've made the changes click CONFIRM
Client's history
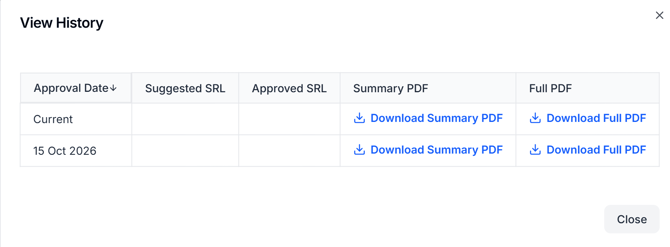
You can view the client's latest report/PDF, and any historical ones, by clicking on the three dots next to the clients name and selecting 'View History'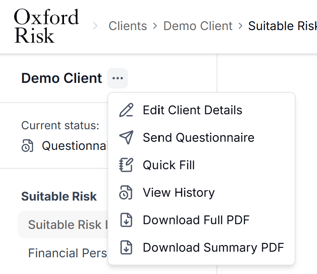
Archive clients
1. On the Clients page, select the user(s) you wish to archive and select 'Archive Clients'.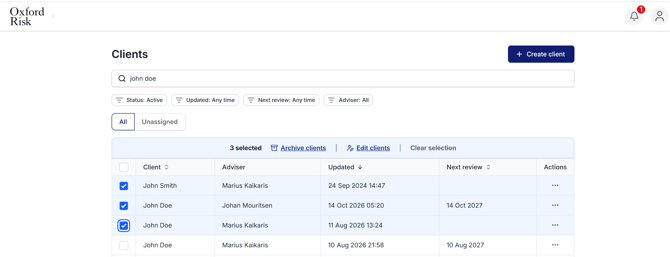
Deleting Clients
Only Admin users can delete clients. If you are an adviser or an assistant, you can only archive clients.
Please be aware that you first need to archive a client before following the below steps.
- Head to the Clients page
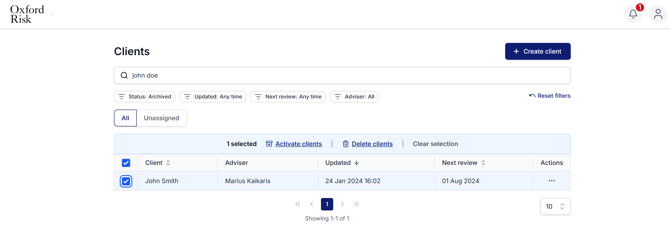
- Change the status filter from ACTIVE to ARCHIVED.
- Find the client or clients you wish to delete.
- Tick the box next to the client name/ID.
- Select 'delete clients'.
Important!
- Deleting a client is irreversible: once you have confirmed the deletion, the client's personal data is gone forever.
- You can only delete clients who have first been archived, so if you can't find the client you're looking for, make sure they are in the list of archived clients.
Reactivate clients
You may sent one of your client to the archive by mistake or simply this is an old client that have come back on you now need the details back on your system. Follow the same steps as above for deleting clients, but be sure to select Activate Clients instead.